The Developer API lets your own systems, such as a CMDB, a data warehouse or another service desk, read what kitset.io already holds, without anybody exporting a spreadsheet. Webhooks go the other way: kitset.io tells your system the moment something happens. Both are set up on the Developer page, under Administration in the Console sidebar.
The developer documentation explains everything on the other side: authentication, webhooks and the endpoint reference.
API keys
The API keys tab lists every key with its Key ID, Scopes, Status, when it was Last used and when it Expires. The heading says how many active keys you have of how many your plan allows.
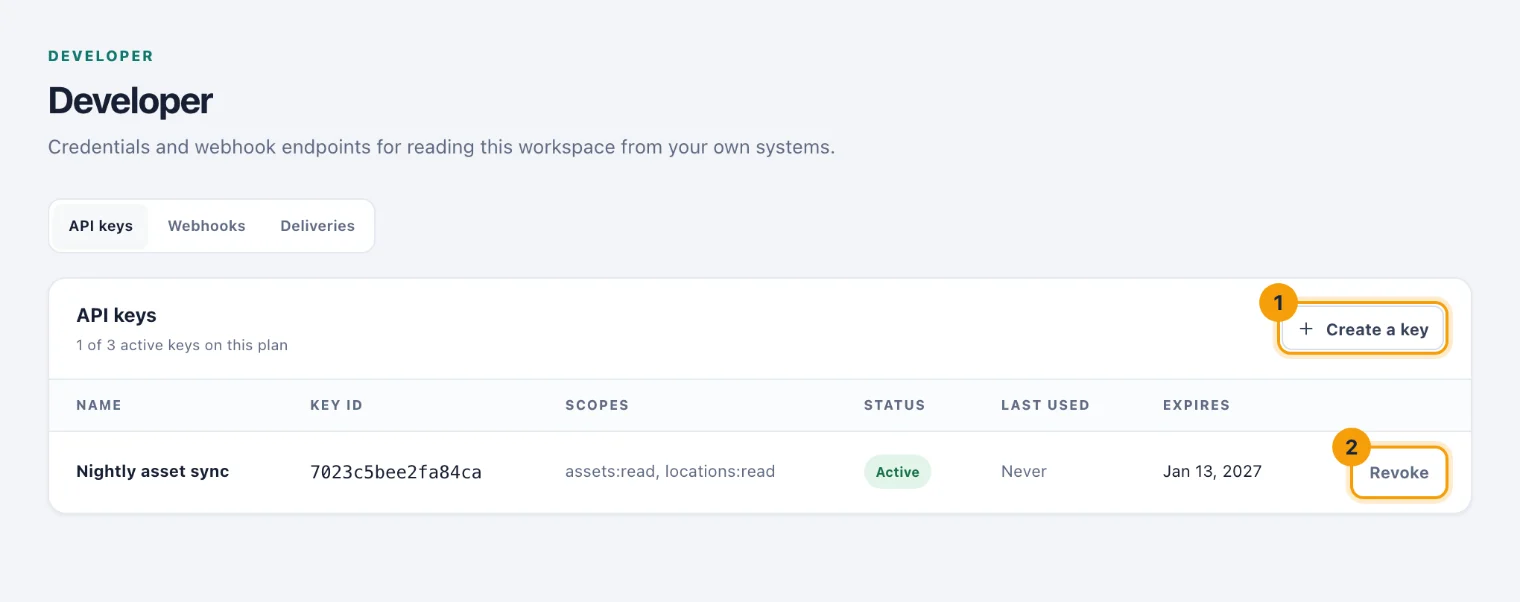
Create a key
Choose Create a key (1).
Enter a Name that says what uses it, such as "Nightly asset sync".
Enter when it Expires in (days): 90 to begin with, at most 365. No key lasts forever.
Tick the Scopes it needs, and no more. Each scope reads one register, such as assets or people. A scope marked Writes changes records: Record KPI results lets the key record a closed period's KPI result, and reads nothing.
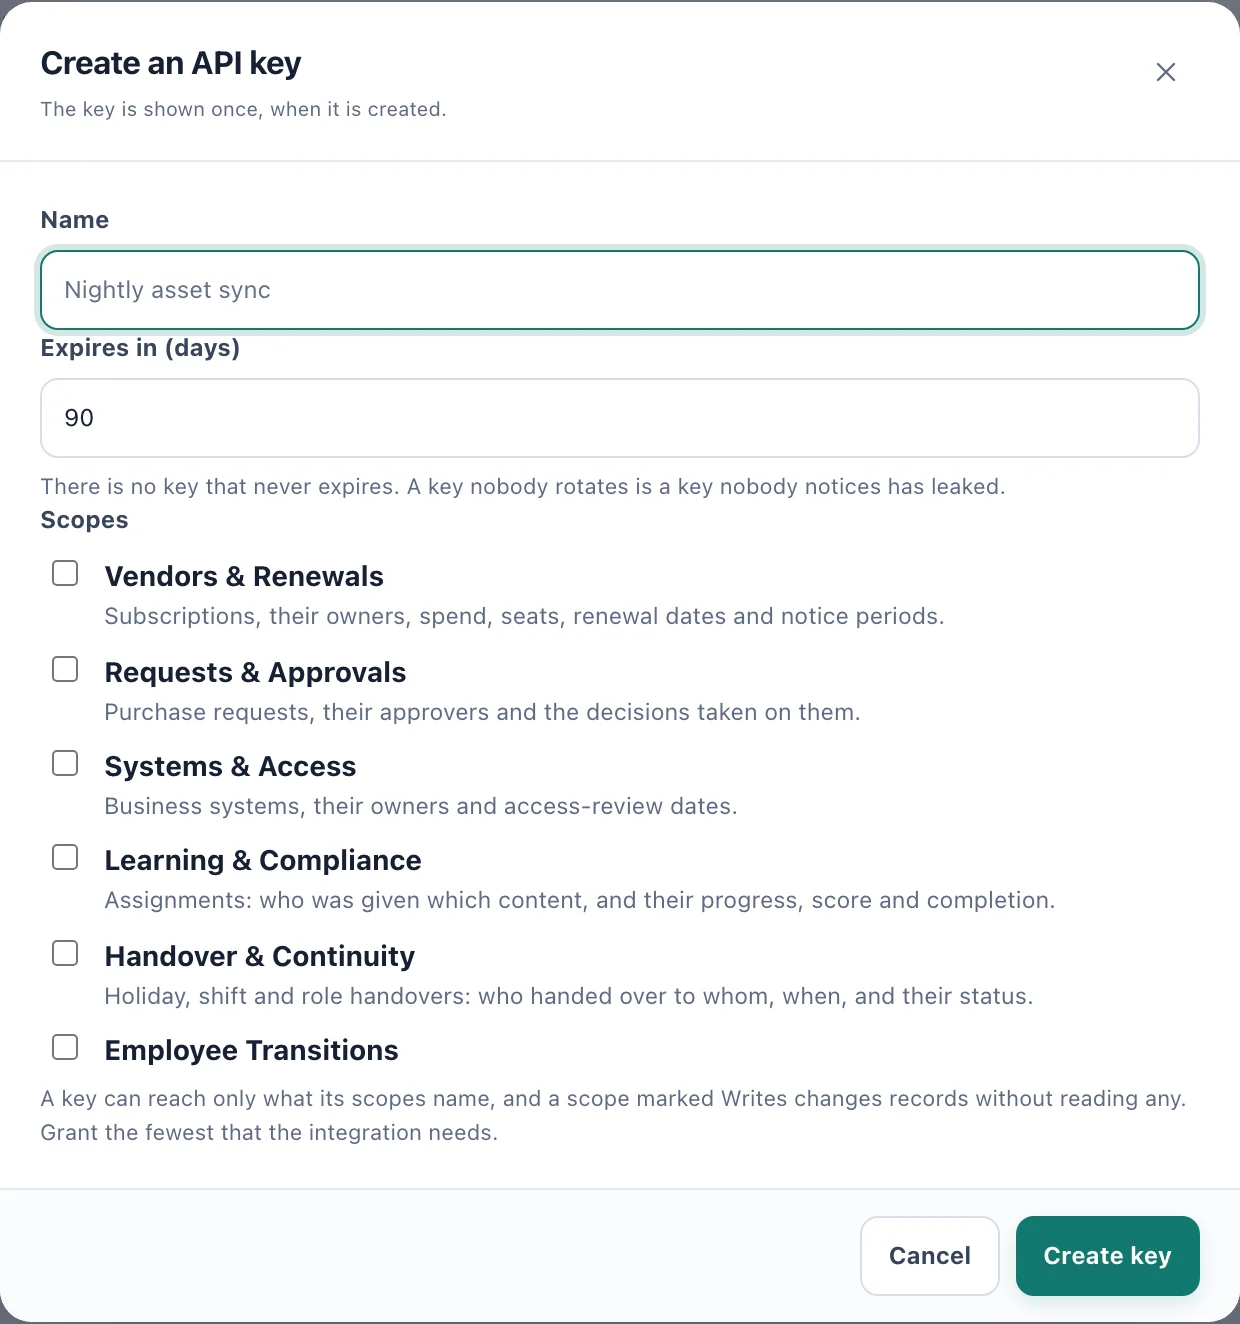
Create an API key: name it, choose when it expires, and tick only the scopes it needs. Choose Create key, then copy the key from Copy your API key now.
Revoke a key
Choose Revoke (2) on its row and confirm. Anything using it is refused straight away, and it cannot be undone. Revoking frees the slot at once, so to rotate a key, create the new one, move your system over, then revoke the old one.
Webhooks
The Webhooks tab lists your endpoints: the addresses kitset.io sends events to. Up to five can be delivering at once.
Choose Add an endpoint.
Enter the URL. It must be https, on port 443, and reachable from the public internet.
Add a Description (optional).
Tick the Scopes it may receive and the Events to send. Each event says which scope it needs; an endpoint hears only events its scopes cover.
Choose Add endpoint, and copy the signing secret. Like a key, it is shown once. Your system uses it to check that each delivery really came from kitset.io.
kitset.io sends a verification request first. The endpoint is Awaiting verification until it answers, then Active. Verify sends the request again.
Rotate secret issues a new signing secret. The old one stops working at once, so deploy the new one straight away.
Disable stops deliveries and keeps the endpoint's history; Enable starts them again. Nothing deletes an endpoint.
An endpoint that keeps failing is disabled automatically, and the reason shows under its status.
Deliveries
The Deliveries tab shows what was sent to one endpoint, newest first: the event, whether it was Delivered, is Pending or was Given up, how many attempts it took and the status code your system answered with. Payload shows exactly what was sent. Send again retries a delivery that was given up.