Spaces are set up in the Console by people with the Manage spaces and bookings permission at the space's location. Admins have it by default. With it, Spaces & bookings has two more tabs beside Book a space and My bookings: Spaces and Waiting for approval.
Add a space
Open the Spaces tab and choose New space. The form opens as a page of its own.
Give it a Name and choose its Kind: Room, Desk or Pod. A desk is for one person.
Choose its Location, and add the Floor (optional) and the number of Seats.
Under Has, tick what it offers: Screen, Video calls, Whiteboard, Phone, Standing desk, Monitor, Accessible.
Set when it Opens and Closes, and the days it is Open on. Hours are the location's own local time.
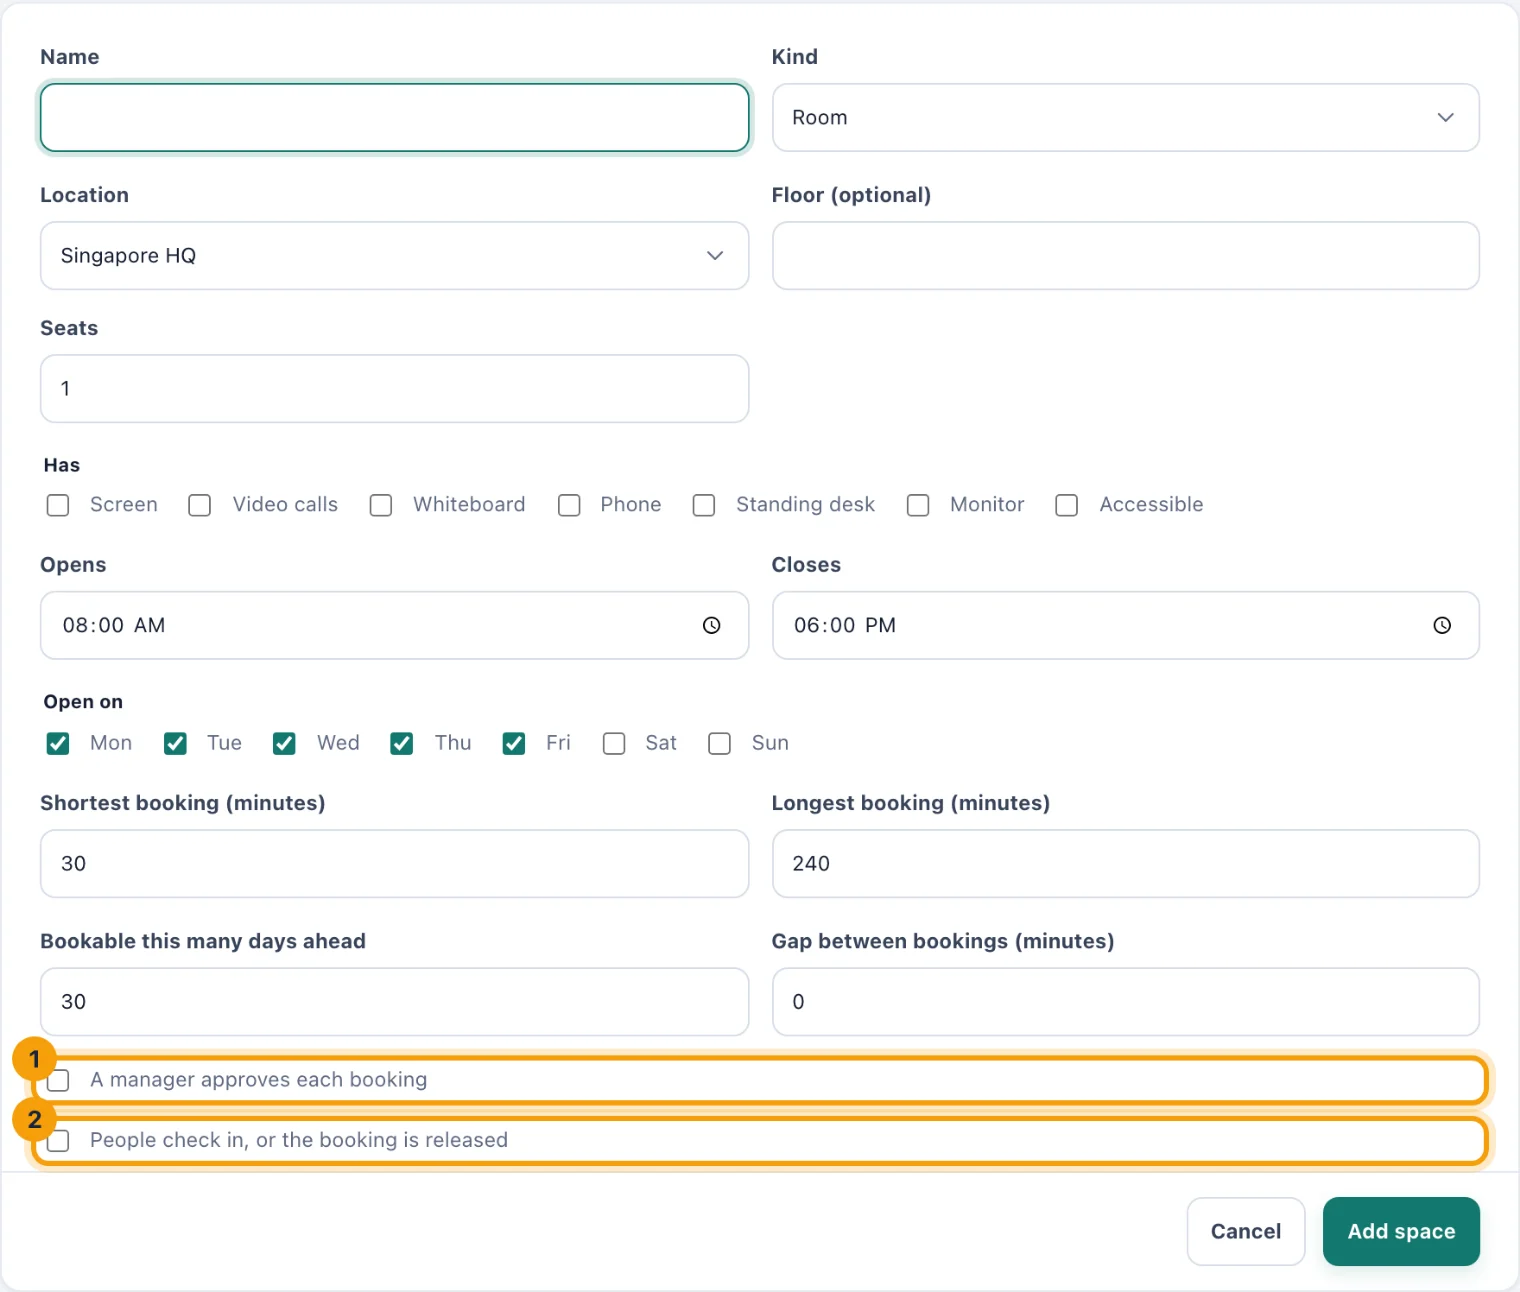
New space: its hours, its rules, and whether bookings need approval (1) or check-in (2). Set its rules: Shortest booking (minutes), Longest booking (minutes), Bookable this many days ahead and Gap between bookings (minutes). A booking is at most 24 hours, opens at most a year ahead, and the gap is at most two hours.
Tick A manager approves each booking if every booking should wait for an answer (1).
Tick People check in, or the booking is released if an unclaimed booking should free the space (2). Then set Released this many minutes after the start, between 5 and 120.
Choose Add space. It appears under Book a space for the people it is open to.
The Employee Portal shows a space to the people who belong to its location. In the Console, people see the spaces at the locations their access covers.
Change, archive or restore a space
The Spaces tab lists every space at the locations you manage, with its hours and rules.
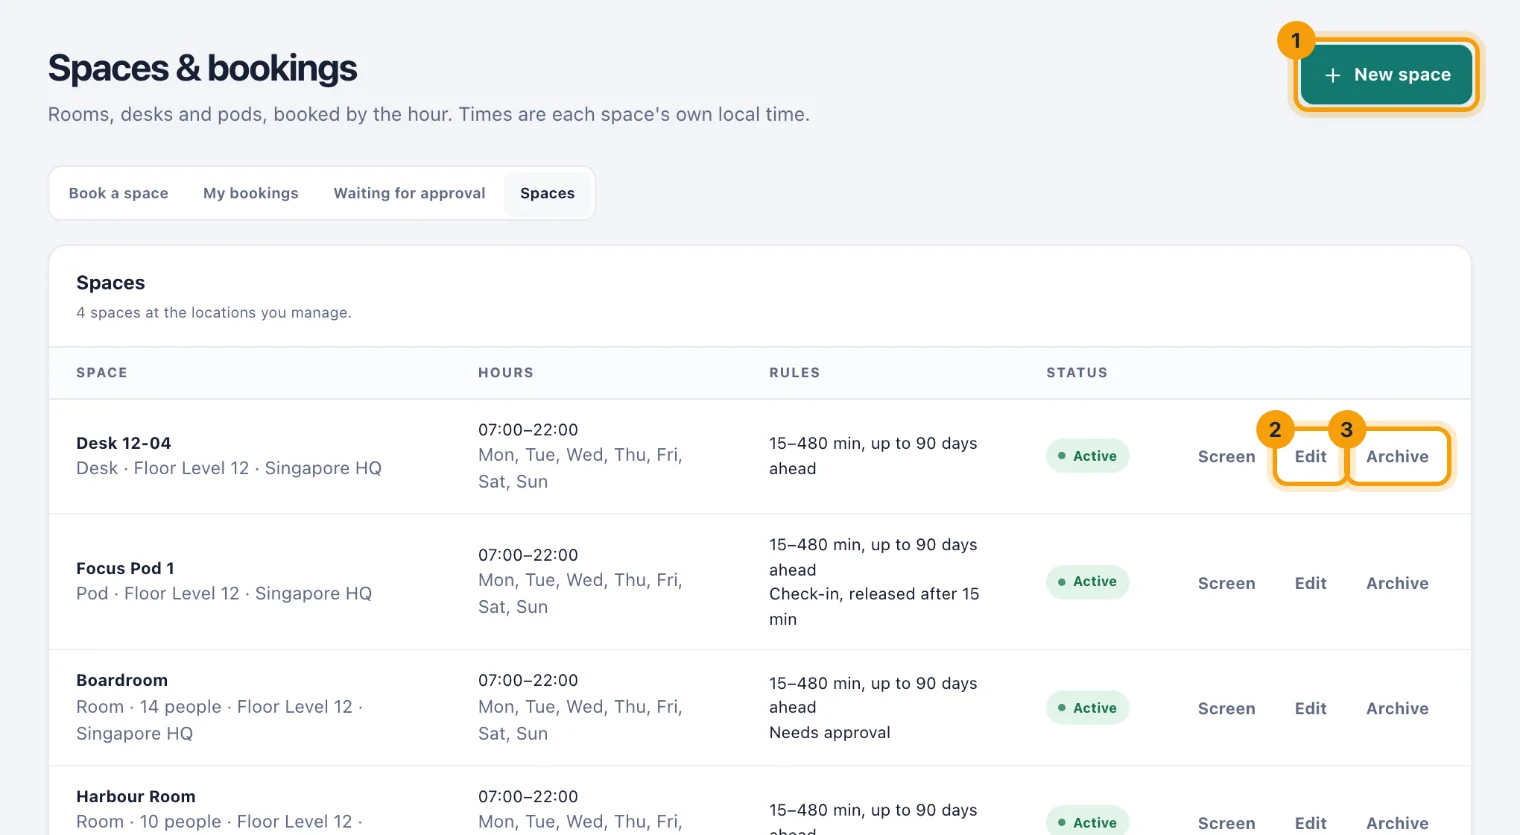
New space (1) adds another.
Edit (2) opens the space's form. Choose Save changes when you are done.
Archive (3) takes a space out of use: nobody can book it until it is restored, and its room screen stops.
Restore brings an archived space back. Make a new screen link for it if it had one.
Screen gives the space a screen by its door. See Room screens.
Approve or decline bookings
When someone asks to book a space that needs approval, the managers at its location are notified, and the booking waits under Waiting for approval, soonest first. It holds its time until you answer.

Choose Approve (1) to confirm it. The person is told and emailed a calendar file.
Or choose Decline (2), add a Reason (optional) for the person, and choose Decline in the dialog. The space becomes free and the person is told.
Your own bookings, and bookings by anyone else who manages the space, do not wait for approval. The space's other rules apply to everyone.